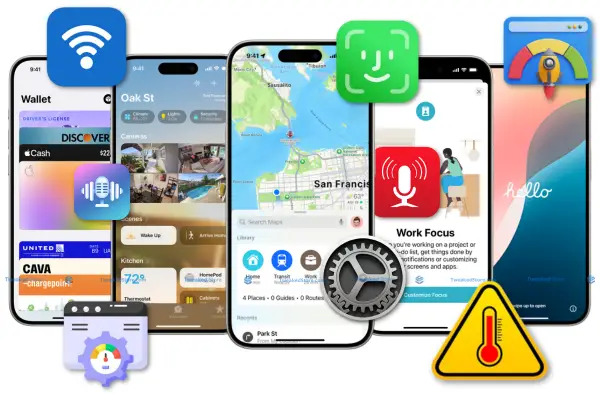
iPhone Issues: Complete Troubleshooting Guide (2026)
If your iPhone is acting up, whether it’s draining battery too quickly, refusing to turn on, or disconnecting from Wi-Fi, you’re not alone. Even the latest iPhone 15 Pro and upcoming iPhone 17 series users face common problems after months (or even weeks) of use. This complete guide covers all normal iPhone issues, how to diagnose them, and proven fixes you can apply at home before considering a repair.
We’ve compiled real-world troubleshooting tips from Apple support experts, technicians, and long-time iPhone users so you can save time, avoid unnecessary repairs, and keep your device running at peak performance.
Table of Contents
- Face ID Problems & Fixes
- Wi-Fi Connection Issues
- Performance Issues
- Overheating & Hardware
- Audio & Speaker Problems
- iPhone Won’t Turn On
- Face ID Problems 2026
- WiFi Problems and Issues
- Speed and Responsive Fixes
- iPhone Hardware Problems
- App and Software Issues
- Troubleshooting Tools & Resources
- FAQ – Issues and Troubleshooting
How to Fix iPhone Black Screen or Won’t Turn On
- Force Restart the iPhone:
- For iPhone 8 or newer: Press and quickly release Volume Up, then Volume Down, then hold the Side Button until you see the Apple logo.
- For older models: Hold Home + Power until the Apple logo appears.
- For iPhone 8 or newer: Press and quickly release Volume Up, then Volume Down, then hold the Side Button until you see the Apple logo.
- Check Charging Equipment: Use an original Apple charger and leave the device plugged in for at least 30 minutes before retrying.
- Inspect for Physical Damage: Drops, water exposure, or faulty batteries can cause startup failures.
- Connect to Finder/iTunes for Recovery Mode: This can reinstall iOS without erasing your data (in some cases).
Following these steps can revive most black screen issues without a trip to the repair shop.
When Hardware Repair Is Required
If the iPhone shows no charging icon, overheats during charge attempts, or fails to boot after a restore, the issue could be:
- Faulty battery connection
- Damaged motherboard
- Water corrosion in power circuits
In these cases, professional repair is often unavoidable.
Face ID Problems & Fixes
Face ID not working can be triggered by software updates, dirty sensors, or hardware damage from drops.
Quick Face ID Troubleshooting Steps
- Clean the TrueDepth Camera: Wipe the notch area gently with a microfiber cloth.
- Check Settings: Go to Settings → Face ID & Passcode and ensure all Face ID functions are enabled.
- Reset Face ID: Remove stored facial data and set it up again in a well-lit environment.
- Update iOS: Face ID issues often get resolved in minor iOS patches.
Advanced Face ID Fixes
- For Face ID not working after iOS update, perform a full settings reset (Settings → General → Transfer or Reset iPhone → Reset All Settings).
- If Face ID fails only in certain apps, re-check in-app permissions.
- Hardware-related failures may involve the TrueDepth camera module, which needs Apple-authorized service.
Most Face ID failures are software-related and can be fixed in minutes without repair costs.
Wi-Fi Connection Issues
An iPhone that keeps disconnecting from Wi-Fi or struggles to join networks is a frequent complaint, especially after major iOS updates.
Wi-Fi Fix Guide
- Forget and Reconnect: Go to Settings → Wi-Fi, tap your network, choose Forget This Network, then reconnect.
- Reset Network Settings: This clears out old or corrupted Wi-Fi data.
- Disable Wi-Fi Assist: Prevents your phone from switching to cellular unexpectedly.
- Check Router & Channel Interference: Restart your router or switch to a less congested Wi-Fi channel.
Special Cases: Wi-Fi Keeps Disconnecting
- If it happens only at home, your router’s firmware may need updating.
- Public network disconnections often relate to captive portals requiring periodic log-ins.
Proper network resets restore stable Wi-Fi in 90% of cases without replacing hardware.
Performance & Speed Issues
If your iPhone feels sluggish, apps take longer to load, or animations lag, the problem may be cluttered storage, background processes, or outdated settings.
Latest iOS 26 Top Performance →
Make Your iPhone Faster
- Free Up Storage: Keep at least 5–10 GB of space free to allow iOS to run efficiently.
- Disable Unused Background App Refresh: Saves both battery and processing power.
- Turn Off Motion Effects & Transparency: Speeds up animations (Settings → Accessibility → Motion).
- Restart Weekly: A quick reboot clears temporary system caches.
With these optimizations, older models like iPhone X can feel nearly as fast as new devices.
Overheating & Hardware
iPhones naturally warm up during gaming, charging, or video editing, but excessive heat signals a problem.
How to Fix iPhone Overheating
- Remove the case during heavy use or charging.
- Avoid direct sunlight and hot car interiors.
- Updating apps causes CPU spikes (often games or camera-heavy apps).
- Disable 5G temporarily if overheating occurs during calls or browsing.
Reducing heat prolongs battery life and prevents long-term hardware wear.
Audio & Speaker Problems
Crackling sounds, low volume, or no audio at all can come from dust buildup, water damage, or iOS audio glitches.
Speaker & Microphone Fixes
- Clean Speaker Grills: Use a soft brush or gentle air.
- Check Sound Settings: Ensure Mono Audio is off and balance is centered.
- Test in Voice Memos: If playback is distorted, the mic may be physically damaged.
- Disable Bluetooth: Sometimes audio is redirected to a paired device.
Cleaning and simple setting adjustments resolve most iPhone sound issues without replacement parts.
iPhone Won’t Turn On: Step-by-Step Recovery Guide
An iPhone that won’t turn on whether it’s showing a black screen, refusing to charge, or completely unresponsive, can be the result of anything from a drained battery to a damaged logic board. This guide walks you through proven iPhone revival procedures, helping you distinguish between minor glitches and serious hardware failures.
iPhone Won’t Turn On: Emergency Revival Procedures
Before assuming the worst, try these revival methods in order:
- Hard Reset Sequences (Model-Specific)
- iPhone 8 and newer (including iPhone 15, 14, 13): Press and quickly release Volume Up, press and quickly release Volume Down, then hold the Side Button until you see the Apple logo.
- iPhone 7 & 7 Plus: Hold Volume Down + Power until the Apple logo appears.
- iPhone 6s and earlier: Hold Home + Power until restart.
- iPhone 8 and newer (including iPhone 15, 14, 13): Press and quickly release Volume Up, press and quickly release Volume Down, then hold the Side Button until you see the Apple logo.
- DFU Mode vs. Recovery Mode
- Recovery Mode reinstalls iOS without wiping data (in many cases).
- DFU Mode is deeper and erases/reinstalls all system software — use only if Recovery Mode fails.
- Recovery Mode reinstalls iOS without wiping data (in many cases).
- Battery Depletion vs. Hardware Failure
- Leave the iPhone on charge for at least 30 minutes before reattempting power-on.
- If it still doesn’t respond, try a different charger and cable to rule out accessory failure.
- Leave the iPhone on charge for at least 30 minutes before reattempting power-on.
- Emergency Charging Methods
- Test with wireless charging (MagSafe/Qi) if wired charging doesn’t work.
- Connect to a computer USB port — slower, but sometimes revives deeply discharged batteries.
- Test with wireless charging (MagSafe/Qi) if wired charging doesn’t work.
These steps revive most iPhones that “won’t turn on” due to software crashes or drained batteries without opening the device.
iPhone Black Screen: Display vs. System Failure Diagnosis
A black screen doesn’t always mean the iPhone is “dead.” The cause may be the display, the operating system, or the power circuit.
- Black Screen with Sound – If you hear notifications, the display connector or cable may be loose or damaged.
- Completely Unresponsive – Could be a logic board fault or a power management IC failure.
- Partial Display Functionality – If you can see faint images or feel touch response, the backlight may be failing.
- Water Damage Indicators – Check SIM tray for a red Liquid Contact Indicator (LCI). If triggered, corrosion may be shorting display circuits.
Pinpointing whether it’s a display or system issue saves unnecessary part replacements.
iPhone Not Working: Complete System Recovery Methods
If the iPhone won’t boot even after hard resets:
- iTunes/Finder Recovery Mode – Connect to a Mac/PC, open Finder (macOS Catalina+) or iTunes (Windows/macOS Mojave and earlier), and choose “Update” or “Restore.”
- Third-Party Recovery Tools – Reiboot, iMyFone Fixppo, and Dr.Fone can repair firmware when Apple tools fail.
- Component-Level Troubleshooting – Test whether other parts (camera, speakers, buttons) function after partial boot.
- Professional Repair vs. DIY – DIY saves money but risks data loss; professional repair is safer if data is critical.
Using recovery tools early can restore a dead iPhone without costly hardware work.
Data Recovery from Dead iPhone: Salvaging Your Information
If the iPhone can’t be revived, your priority may be recovering important photos, contacts, and documents.
- Extracting Data with Specialized Tools – Programs like iMobie PhoneRescue or EaseUS MobiSaver can read data directly from storage chips in partially responsive devices.
- iCloud Backup Verification – Log into iCloud.com or the Settings → Apple ID → iCloud → Manage Storage on another device to confirm your latest backup.
- Third-Party Data Recovery – Professional labs can achieve 70–90% recovery success depending on hardware damage severity.
- Prevention Strategies – Enable automatic iCloud backups over Wi-Fi, or use Finder/iTunes for regular encrypted backups.
Even a completely dead iPhone can still yield your data with the right tools and preparation.
Face ID Problems: Complete Fix Tutorial & Hardware Solutions
Face ID is one of the most secure and convenient authentication systems on modern iPhones, but it can fail for reasons ranging from iOS bugs to hardware damage. This section walks you through software fixes, hardware diagnostics, and advanced optimization techniques so you can restore Face ID performance or find the best workaround if repair is needed.
Face ID Not Working: iOS Update and Software Troubleshooting
Some Face ID issues appear right after an iOS update, particularly with new features in iOS 26. Here’s how to address them:
- iOS 26 Compatibility & Known Bugs – Check Apple’s release notes for temporary Face ID issues; minor patches often resolve them.
- Face ID Reset & Re-Enrollment – Delete your current Face ID data and re-scan your face under bright, even lighting. Tilt your head during setup for maximum coverage.
- Attention Aware Features – If Face ID fails to unlock when you’re looking directly at it, try disabling Settings → Face ID & Passcode → Require Attention for Face ID.
- Low Light & Extreme Conditions – Enable adequate lighting or adjust angles to improve accuracy; Face ID uses infrared, but some environments still reduce reliability.
Face ID Problems Fix: Hardware Component Diagnosis
When software isn’t the cause, hardware inspection is the next step:
- TrueDepth Camera Failures – The flood illuminator, dot projector, or infrared camera may fail after drops or water exposure.
- Safe Face ID Sensor Cleaning – Use a soft microfiber cloth to gently wipe the notch area. Avoid liquid cleaners that can damage coatings.
- Screen Replacement Impact – Unofficial or poorly executed screen replacements can permanently disable Face ID due to paired hardware security.
- Proximity Sensor Interference – Dust or debris blocking the sensor can cause false readings; cleaning can restore accuracy.
Face ID Not Available Error: System-Level Recovery Methods
When you see “Face ID is not available,” it’s a sign of deeper system or hardware authentication failure.
- Post-Update Recovery – Restore the iPhone via Finder/iTunes without erasing data to refresh system Face ID components.
- Hardware Authentication Failures – If parts of the TrueDepth module fail, Face ID cannot be repaired outside Apple-authorized service.
- Alternative Authentication Setup – Enable Settings → Accessibility → AssistiveTouch and use passcodes or custom gestures as a temporary workaround.
- Professional Face ID Repair – Apple can replace certain Face ID parts (like flood illuminators) on supported models, but in some cases a full device replacement is required.
Advanced Face ID Optimization: Security and Performance
Power users can configure Face ID for both convenience and maximum security:
- Multiple Appearance Setup – Add a second appearance for different hairstyles, glasses, or frequent look changes.
- Face ID with Masks & Accessories – In Settings → Face ID & Passcode, enable mask recognition for better results in public settings.
- Privacy & Security Settings – Adjust app-specific Face ID permissions to control which apps request authentication.
- Performance Monitoring – If Face ID slowly becomes less accurate, re-enroll early to maintain speed and reliability.
iPhone WiFi Problems: Connection Issues Complete Fix Guide
Whether your iPhone refuses to join a Wi-Fi network, drops the connection randomly, or struggles with slow speeds, Wi-Fi issues can stem from network settings, router compatibility, or iOS-level configurations. This guide covers basic troubleshooting, advanced fixes, and professional-level diagnostics to restore a reliable connection.
iPhone WiFi Not Working: Network Connectivity Troubleshooting
Start with these steps to identify and fix common Wi-Fi connectivity issues:
- Wi-Fi Network Diagnostics – Go to Settings → Wi-Fi, tap the network name, and check for IP address assignment and signal strength. Poor signal or frequent drops can indicate channel interference from nearby networks.
- Router Compatibility Issues – Many older routers use only the 2.4GHz band, which is slower but has longer range. Newer iPhones perform better on 5GHz, but range may be shorter. Ensure your router supports both, and test each band.
- DNS Server Optimization – Switch to a reliable DNS (such as Google DNS: 8.8.8.8, 8.8.4.4 or Cloudflare: 1.1.1.1) via Settings → Wi-Fi → Network → Configure DNS. This can improve loading speed and stability.
- VPN Interference – Some VPNs block or slow Wi-Fi traffic. Temporarily disable your VPN to see if speeds improve or connection stabilizes.
iPhone WiFi Problems Complete Fix: Advanced Network Solutions
If basic troubleshooting fails, apply these advanced solutions:
- Network Settings Reset – Go to Settings → General → Transfer or Reset iPhone → Reset → Reset Network Settings. This deletes saved Wi-Fi networks, passwords, and VPN configurations, so note them before resetting.
- Wi-Fi Password & Authentication Issues – WPA3 security is supported in iOS 14 and later, but older routers may fail to connect. Switching to WPA2/WPA3 mixed mode can help.
- Corporate & Enterprise Wi-Fi – If using workplace or school Wi-Fi, ensure required profiles or certificates are installed under Settings → General → VPN & Device Management.
- Hotspot & Tethering Problems – For personal hotspot, go to Settings → Cellular → Personal Hotspot and ensure “Allow Others to Join” is enabled. On the connecting device, forget and rejoin the hotspot network.
Wi-Fi Speed and Performance Issues: Connection Optimization
When your iPhone connects but feels slow, the bottleneck may be local interference or network configuration:
- Wi-Fi Speed Testing – Use apps like Speedtest.net to measure download/upload rates. If speeds drop significantly in certain rooms, range or interference is the cause.
- Automatic Network Switching Problems – Disable Wi-Fi Assist under Settings → Cellular if your iPhone keeps switching to mobile data. Manage preferred networks under Settings → Wi-Fi → Edit.
- Wi-Fi Calling Issues – Check Settings → Phone → Wi-Fi Calling and ensure your carrier supports it. Wi-Fi calling requires a stable broadband connection with low latency.
- Mesh Network Compatibility – If using multi-router systems, ensure all nodes run the latest firmware and are properly placed to avoid overlapping coverage zones.
Advanced Wi-Fi Troubleshooting: Professional Network Solutions
For persistent or complex issues, professional-level tools and settings may be required:
- Wi-Fi Analyzer Tools – Apps like AirPort Utility (iOS) or macOS Wi-Fi scanner can detect interference sources, overlapping channels, and dead zones.
- Enterprise Network Troubleshooting – Manage security certificates, profile installations, and VLAN configurations if connecting to advanced business networks.
- Wi-Fi 6 / Wi-Fi 6E Compatibility – Some routers require firmware updates to properly support the latest iPhone models using Wi-Fi 6 or 6E.
- Network Security Troubleshooting – Ensure firewalls or access point security settings aren’t blocking your iPhone’s MAC address. Disable MAC filtering temporarily to test.
iPhone Performance Issues: Speed and Responsiveness Fixes
When your iPhone slows down, lags, or becomes unresponsive, the cause can range from low storage and battery degradation to software glitches or background processes. This step-by-step guide covers performance optimization, storage management, and touch responsiveness fixes to help you restore smooth operation.
iPhone Running Slow Fix Guide: Performance Optimization Strategies
If your iPhone feels sluggish, these techniques can boost speed:
- iOS Performance Throttling – In Settings → Battery → Battery Health & Charging, check Peak Performance Capability. iOS may throttle CPU speed if the battery is degraded. Replacing the battery can restore full performance.
- RAM Management Optimization – Limit background app refresh under Settings → General → Background App Refresh. Force-close unused apps when multitasking heavily to free up RAM.
- Storage Performance Impact – Keep at least 10–15% of total storage free. A nearly full iPhone slows down system file operations and app launches.
- Cache Clearing & Temporary Files – Offload unused apps (Settings → General → iPhone Storage), clear Safari cache (Settings → Safari → Clear History and Website Data), and restart your iPhone to remove temporary files.
iPhone Storage Full Solutions: Advanced Space Management
Full storage can cause app crashes, freezes, and slowdowns. Here’s how to free space without losing data:
- Storage Analysis – Go to Settings → General → iPhone Storage to see which apps consume the most space, including hidden caches from social media apps.
- Photo & Video Optimization – Enable Settings → Photos → Optimize iPhone Storage to store full-resolution media in iCloud. Use HEIC for images and HEVC for videos to reduce file sizes without noticeable quality loss.
- App Data Management – Many apps allow cache clearing in-app settings without deleting the app itself. For example, clear downloaded Netflix content or podcast downloads.
- System Storage Mysteries – The “System Data” category grows due to logs and temporary files. This can shrink after a restart or iOS update. If it’s excessively large, perform a backup and full restore.
iPhone Screen Not Responding Fix: Touch and Display Issues
When your screen doesn’t respond, determine whether the issue is software or hardware:
- Touch Responsiveness Calibration – Restart the iPhone to reset touch processes. If the issue persists, boot into Recovery Mode and reinstall iOS.
- Screen Protector Interference – Poor-quality protectors or excessive thickness can affect touch sensitivity. Switch to a thinner, high-quality glass protector.
- Moisture & Environmental Factors – Water, sweat, or extreme temperatures can make the touchscreen less responsive. Dry the screen and hands before use.
- Accessibility Features for Touch – Enable Touch Accommodations under Settings → Accessibility → Touch to adjust touch sensitivity thresholds.
iOS System Performance: Advanced Optimization Techniques
Power users can take extra steps to keep iOS responsive:
- Background Processing Optimization – Disable Siri Suggestions and Spotlight indexing for rarely used apps in Settings → Siri & Search and Settings → General → Spotlight Search.
- Animation & Visual Effects – Reduce motion (Settings → Accessibility → Motion → Reduce Motion) and transparency to speed up navigation.
- Low Power Mode Alternatives – Instead of constant Low Power Mode, create Focus or Shortcuts profiles that disable power-hungry features when needed.
- App-Specific Performance Issues – If one app is consistently slow, delete and reinstall it, or check for updates that address performance bugs.
Most Popular Tutorials
👉 iPhone Hidden Features – Read More →
👉 iPhone Automation Tips – Read More →
👉 iPhone Productivity 2026 – Read More →
👉 iPhone Backup and Restore – Read More →
👉 iPhone Customize and Optimize – Read More →
iPhone Hardware Problems: Overheating and Physical Issues
Hardware issues on the iPhone can range from overheating to speaker or microphone malfunctions. If left unresolved, these problems may worsen and cause permanent damage. This guide provides step-by-step fixes for common iPhone hardware issues, plus advanced diagnostics to identify deeper faults.
iPhone Overheating Problems Fix: Thermal Management Solutions
Overheating is a warning sign that your iPhone’s internal components are under stress. To prevent long-term damage:
- Heat Source Identification – Monitor if overheating occurs during charging, gaming, or video recording. High CPU usage, faulty batteries, and fast charging are common culprits. Check battery health in Settings → Battery → Battery Health & Charging.
- Environmental Factors – Avoid using the iPhone in direct sunlight or in temperatures above 35°C (95°F). High humidity can also reduce cooling efficiency.
- Case & Accessory Impact – Thick or non-ventilated cases can trap heat. Remove the case temporarily when performing demanding tasks.
- Thermal Throttling – If the iPhone slows down when hot, it’s protecting itself. Stop intensive usage and allow it to cool naturally to prevent permanent hardware damage.
iPhone Speaker Problems Fix Guide: Audio Output Troubleshooting
A malfunctioning speaker can affect calls, music, and media playback. Follow these steps:
- Speaker Cleaning – Use a soft brush or compressed air to gently remove dust. For moisture, place the iPhone in a dry environment or use a silica gel pack—not rice—to absorb humidity.
- Audio Balance & Stereo Testing – In Settings → Accessibility → Audio/Visual, check left/right balance to ensure both speakers function.
- Bluetooth Audio Interference – If audio plays through a Bluetooth device instead of the speaker, disable Bluetooth or disconnect devices in Settings → Bluetooth.
- Water Damage Assessment – Check for muffled sound after exposure to water. Allow the phone to dry completely before further testing.
iPhone Microphone Not Working Fix: Input Audio Solutions
If people can’t hear you or voice recordings sound unclear.
- Microphone Location Identification – iPhones have multiple microphones: bottom (calls), front (FaceTime), and rear (video recording). Test each one using the Voice Memos and Camera apps.
- Noise Cancellation Problems – Disable Phone Noise Cancellation in Settings → Accessibility → Audio/Visual to rule out faulty noise reduction processing.
- App Permissions – Check Settings → Privacy & Security → Microphone to ensure apps like Zoom or WhatsApp have access.
- Repair vs. Replacement – If the microphone still doesn’t work after software troubleshooting, a hardware repair may be necessary. Authorized Apple service can determine if replacement is required.
Advanced Hardware Diagnostics: Component Testing Methods
For complex hardware faults, advanced diagnostics can pinpoint the problem:
- Built-in Diagnostic Tools – Apple Support can remotely run diagnostics on your iPhone. Contact them via the Apple Support app or website.
- Third-Party Diagnostic Apps – Tools like “Phone Diagnostics” or “TestM” can check touch, sensors, speakers, and microphones individually.
- Visual Inspection Techniques – Look for cracks, dents, or signs of swelling around the display or frame, which may indicate internal damage.
- Professional Repair Assessment – If physical damage or severe faults are detected, seek an Apple Authorized Service Provider for component-level repair.
iPhone App and Software Issues: System-Level Troubleshooting
From random app crashes to failed iOS updates, iPhone software problems can disrupt productivity and usability. This guide provides step-by-step fixes for iPhone app crashes, system issues, and update failures, ensuring your device runs smoothly.
iPhone App Crashes and Freezing: Application Management Solutions
Apps may crash or freeze due to compatibility issues, corrupted data, or memory limitations. Here’s how to restore stability:
- App Compatibility with iOS Versions – After a major iOS update, some apps may not yet be optimized. Check the App Store for updates or revert to an older app version if possible. Avoid sideloading unsafe builds from untrusted sources.
- Memory Management for Resource-Intensive Applications – Close unused apps running in the background and restart your iPhone regularly. Heavy apps like games or video editors require extra RAM, so run them alone for better stability.
- App Store Download and Installation Problems – Ensure you are signed in to the correct Apple ID. Verify your internet connection (Wi-Fi or cellular) and payment methods if the app is paid.
- Background App Refresh Optimization – In Settings → General → Background App Refresh, disable it for apps you rarely use to reduce memory usage and prevent background crashes.
iPhone Software Update Problems: iOS Installation and Recovery
iOS updates can fail during download, verification, or installation. If that happens:
- Failed iOS Update Recovery – Use DFU mode (Device Firmware Update) to restore your iPhone when standard recovery fails. Connect to a Mac/PC with Finder or iTunes for reinstalling iOS.
- Update Verification Failures – Make sure your iPhone is connected to a stable network, has enough storage, and the date/time settings are correct.
- Downgrade Possibilities – If a new iOS version causes app or battery problems, you may be able to revert to the previous version while Apple is still signing it.
- Beta Software Problems – If you’re using iOS beta and experience instability, remove the beta profile in Settings → General → VPN & Device Management and restore to the latest stable iOS release.
iPhone System Service Issues: Core Functionality Problems
Some iPhone problems originate from system services rather than apps:
- iCloud Synchronization Failures – Sign out and back into iCloud in Settings → [Your Name], ensure you have enough iCloud storage, and verify that sync options are enabled for each app.
- Siri and Voice Recognition Problems – Test microphones in Voice Memos and Camera apps to confirm hardware works. Re-train Siri by disabling and re-enabling “Listen for ‘Hey Siri’” in settings.
- Camera App Crashes and Functionality – Clear background apps, ensure iOS and Camera app are up-to-date, and test with third-party camera apps to rule out hardware damage.
- Apple Pay and NFC Problems – Make sure NFC is enabled, check your payment method in Wallet, and verify your region supports Apple Pay. For persistent errors, remove and re-add your cards.
iPhone Troubleshooting Tools and Resources: Advanced Recovery Methods
When basic fixes don’t solve your iPhone problems, specialized diagnostic and recovery tools become essential. This guide covers professional hardware and software testing, recovery software options, and when to consider expert repairs to maximize your iPhone’s lifespan and data integrity.
Professional iPhone Diagnostic Tools: Hardware and Software Testing
Apple and technicians use a range of tools to identify faults precisely:
- Apple’s Internal Diagnostic Procedures – At Apple Stores’ Genius Bars, technicians run proprietary diagnostics that test battery health, sensors, cameras, and other hardware components using official Apple software.
- Third-Party Diagnostic Software – Apps like Phone Diagnostics, TestM, or Lirum Device Info provide comprehensive tests for CPU, memory, battery, cameras, and sensors, offering insight without needing a service appointment.
- Component-Level Testing – Specific tools or apps can individually verify hardware parts, such as speaker tests, microphone input, proximity sensors, and touch screen responsiveness.
- Bootloader and Firmware Diagnostics – Low-level tests run during DFU mode check for corrupted firmware or bootloader issues that might cause system instability or startup failures.
iPhone Recovery Software: System Restoration and Data Recovery
If your iPhone won’t boot or system files are corrupted, recovery software is your next step:
- iTunes Alternatives – Modern tools like ReiBoot, Dr.Fone – Repair, or Tenorshare UltData offer user-friendly interfaces to repair iOS system problems without full data loss.
- Third-Party Recovery Software – While many tools promise recovery, success rates vary; always use trusted software to avoid malware or data breaches.
- Data Recovery from Corrupted Devices – Professional services can extract data from severely damaged devices, but costs are high. Consumer tools often handle logical corruption but fail with physical damage.
- Backup Restoration Troubleshooting – Corrupted backups can cause restore failures. Tools like iBackupBot help repair or extract data from problematic backups before restoring to the device.
When to Seek Professional iPhone Repair: Cost-Benefit Analysis
Knowing when to DIY or seek professional help can save money and frustration:
- DIY Repair Limitations – Opening your iPhone risks damage to fragile components and voids warranties. Success depends on your technical skill and access to quality parts.
- Authorized vs. Third-Party Repair – Apple repairs maintain warranty and use genuine parts but cost more. Third-party shops are cheaper but may use aftermarket parts and have variable quality.
- Component Replacement Costs – Batteries and screens are the most commonly replaced parts; logic board or camera repairs are more expensive and sometimes not cost-effective.
- Data Recovery Services – Critical data loss may justify professional recovery, but weigh cost against the value of the data and possibility of permanent loss.
FAQ – iPhone Issues and Troubleshooting
Why is my iPhone battery draining so fast?
Rapid battery drain can result from background app activity, high screen brightness, or outdated software. To mitigate this:
- Enable Low Power Mode via Settings > Battery to reduce power consumption.
- Disable Background App Refresh in Settings > General > Background App Refresh.
- Adjust screen brightness and turn off Raise to Wake in Settings > Display & Brightness.
- Monitor battery usage by app in Settings > Battery to identify power-hungry applications.
Why won’t my iPhone turn on?
If your iPhone remains unresponsive:
- Charge your device for at least 30 minutes using a certified charger.
- Perform a force restart:
- Press and quickly release the Volume Up button.
- Press and quickly release the Volume Down button.
- Press and hold the Side button until the Apple logo appears.
- Press and quickly release the Volume Up button.
- If the screen remains black, connect to a computer and use iTunes or Finder to restore the device.
Why is Face ID not working on my iPhone?
Face ID issues can stem from software glitches or hardware malfunctions:
- Navigate to Settings > Face ID & Passcode and tap Reset Face ID.
- Ensure the TrueDepth camera is unobstructed and clean.
- Verify that Attention Aware Features are enabled in Settings > Face ID & Passcode.
- If problems persist, consider re-enrolling your face or consult Apple Support for hardware diagnostics.
Why does my iPhone keep disconnecting from Wi-Fi?
Persistent Wi-Fi disconnections may be due to:
- Wi-Fi Assist switching to cellular data when Wi-Fi is weak; disable it in Settings > Cellular.
- Outdated router firmware; update your router’s software.
- Network interference; try changing the Wi-Fi channel on your router.
- Reset Network Settings via Settings > General > Reset > Reset Network Settings.
How to fix iPhone battery drain?
To address excessive battery drain:
- Enable Low Power Mode to reduce power usage.
- Update to the latest iOS version, as updates often include battery optimizations.
- Limit Background App Refresh and Location Services in Settings.
- Turn off Push Email and set email fetching to manual in Settings > Mail > Accounts > Fetch New Data.
How to fix iPhone black screen?
If your iPhone screen remains black:
- Charge the device for 30 minutes.
- Perform a force restart as previously described.
- If unresponsive, connect to a computer and use iTunes or Finder to restore the device.
How to fix Face ID not working?
For Face ID issues:
- Reset Face ID in Settings > Face ID & Passcode.
- Ensure the TrueDepth camera is clean and unobstructed.
- Re-enroll your face data if problems persist.
How to fix iPhone Wi-Fi problems?
To resolve Wi-Fi connectivity issues:
- Forget and reconnect to the Wi-Fi network in Settings > Wi-Fi.
- Restart your router and iPhone.
- Disable Wi-Fi Assist in Settings > Cellular.
- Reset Network Settings if necessary.
What to do when iPhone won’t turn on?
If your iPhone doesn’t power on:
- Charge the device for at least 30 minutes.
- Perform a force restart.
- Connect to a computer and use iTunes or Finder to restore the device.
How to make iPhone battery last longer?
To extend battery life:
- Enable Low Power Mode.
- Limit Background App Refresh and Location Services.
- Reduce screen brightness and turn off Raise to Wake.
- Use Auto-Brightness and Auto-Lock features.
Why is my iPhone running so slow?
Performance issues can be caused by:
- Outdated software; ensure iOS is up to date.
- Excessive background processes; close unused apps.
- Limited storage space; delete unnecessary files and apps.
- Consider performing a factory reset if issues persist.
How to fix iPhone overheating?
To prevent overheating:
- Avoid using the device while charging.
- Remove the case during intensive tasks.
- Close unused apps running in the background.
- Keep the device out of direct sunlight and hot environments.
Why is my iPhone speaker not working?
Speaker issues may arise from:
- Debris or moisture in the speaker grille; clean gently.
- Incorrect audio settings; check volume and sound settings.
- Bluetooth devices connected; disconnect if necessary.
- Test with different apps to identify if the issue is app-specific.
How to fix iPhone microphone problems?
Microphone issues can be addressed by:
- Ensuring no obstructions or dirt are present.
- Testing the microphone in various apps to identify the source.
- Verifying app permissions for microphone access.
- Performing a force restart if necessary.
Why is my iPhone storage full?
To manage storage:
- Utilize iCloud for storing photos and documents.
- Review storage usage in Settings > General > [Device] Storage.
- Delete unused apps, photos, and videos.
- Offload unused apps in Settings > General > [Device] Storage.